w2polygon2csv is a very useful WDSS-II tool for researchers. This post shows an example of how to use it.
The question I want to answer: “What are the polarimetric characteristics of gust fronts”?
The methodology is to:
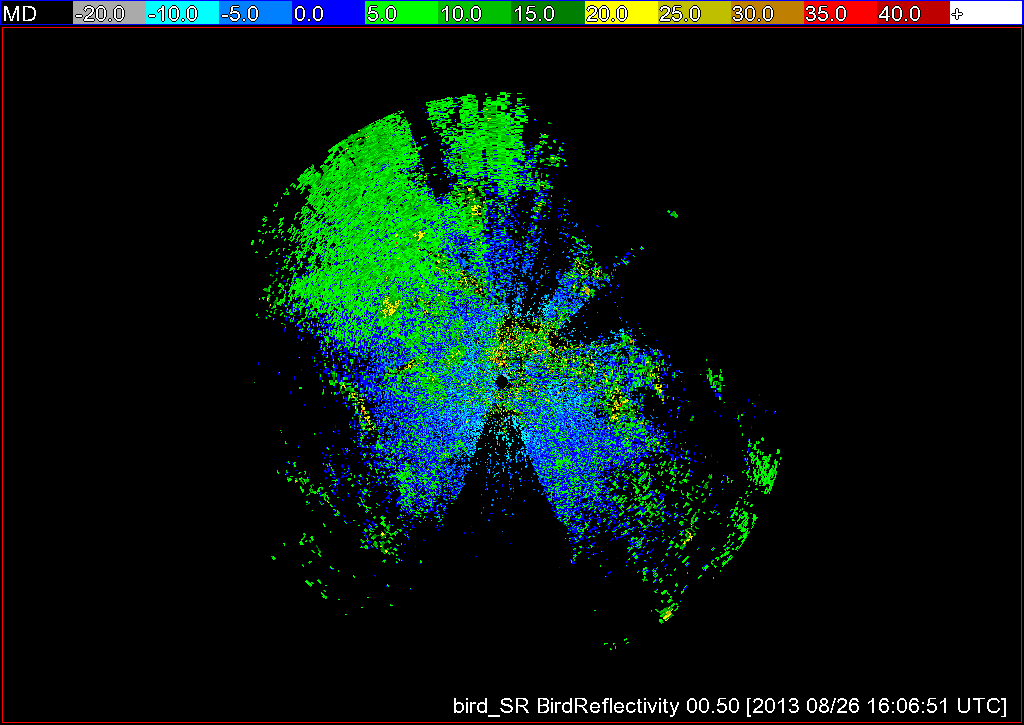
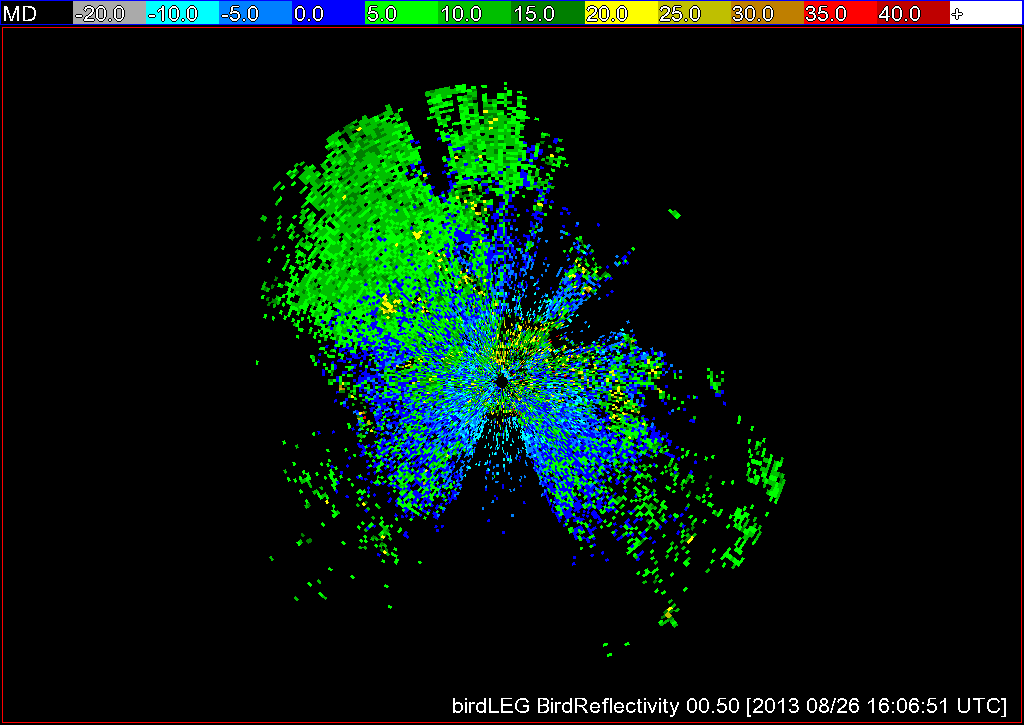
- collect a set of polarimetric radar data that have gust fronts
- draw polygons around the gust fronts using wg
- Use w2polygon2csv to extract all the pixel data within the polygons
- Write a R program to do linear regression of the parameters to identify gust fronts
- write a program to draw histograms
Step 1: Data collection and ingest
I downloaded the necessary Level-II data from NCDC’s HAS website , untarred it and put it all in a directory named “raw”. The directory listing looks like this.
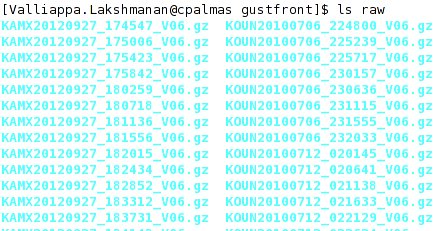 Note that I have put all the files (even those from different radars) into the same directory.
While you could ingest them all separately into separate directories for each of the radars, it is more convenient (scripting-wise) to fool downstream algorithms by pretending that all the data comes from the same radar (I’ll assume KOUN). This is done by the following call to ldm2netcdf:
rm -rf KOUN/netcdf; ldm2netcdf -i `pwd`/raw -o `pwd`/KOUN/netcdf -s KOUN -a -1 -p gz --verbose; makeIndex.pl `pwd`/KOUN/netcdf code_index.xml
After this, you will have a directory called KOUN/netcdf within which will be netcdf files corresponding to Reflectivity, Zdr, etc.
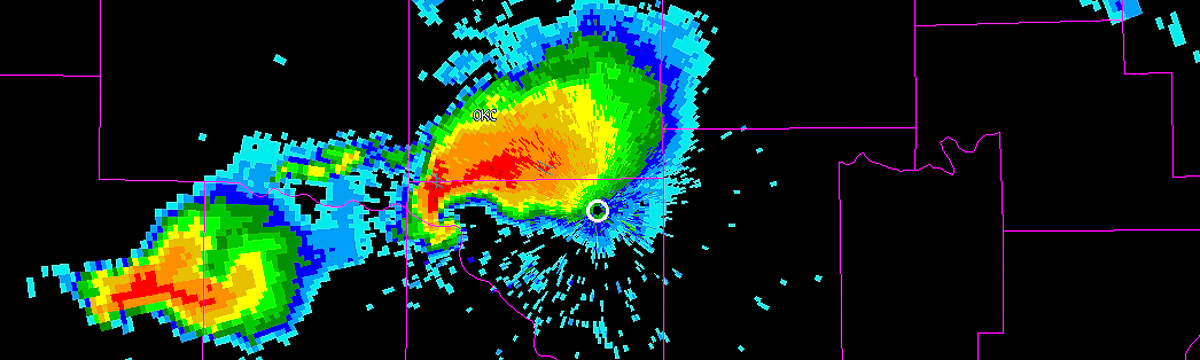
Step 2: Drawing polygons
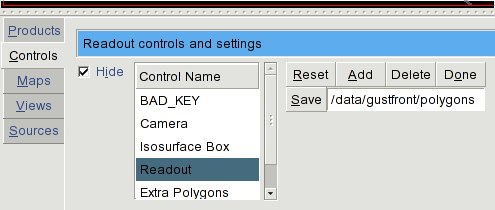
Start up wg and select Controls | Readout. Change the output directory in the unmarked textbox (the default is probably /tmp) to the location where you want the polygon files saved:
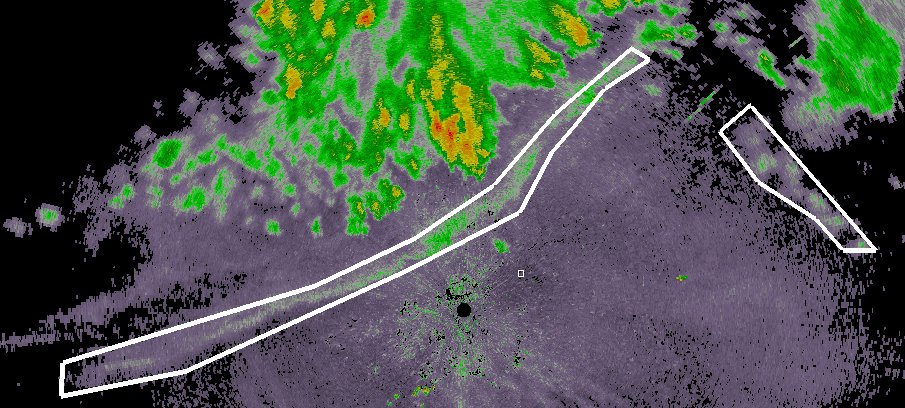
 Bring up your data product (in this case, Reflectivity). Click on Add and then click around the gustfront to draw a polygon around the gustfront. If you have multiple gust fronts, use the Done button to finish one polygon and start another. When you are finally done, click Save:
 At this point, a polygon XML file is written to the output directory. It will have a name like GustFront_Reflectivity_20120709-003408.xml where GustFront is the name of the data source in wg, Reflectivity the name of the product and the rest of the filename is the time stamp.
Move to the next image, click Reset to clear the existing polygon from the display and draw the set of polygons corresponding to the new time step. Repeat for all your data cases (you can skip time steps if you want).
Step 3: Extract pixel data using w2polygon2csv
It is helpful to extract data both from within the polygons (“gustfronts”) and from outside the polygons (“not gustfronts”). The raw data that I want to collect are Reflectivity, AliasedVelocity, RhoHV and Zdr. I can also collect any other data as long as I have an algorithm that will produce that data in polar format.
Run w2polygon2csv as follows:
#!/bin/sh

makeIndex.pl `pwd`/KOUN/netcdf code_index.xml

rm -rf csv; mkdir -p csv/gf csv/ngf
INPUTS="Reflectivity:00.50 AliasedVelocity:00.50 RhoHV:00.50 Zdr:00.50"
NUMINPUTS=`echo $INPUTS | wc -w`
w2polygon2csv -i `pwd`/KOUN/netcdf/code_index.xml -I "$INPUTS" -o `pwd`/csv/gf -p `pwd`/polygons -F 60 -N $NUMINPUTS --verbose
w2polygon2csv -i `pwd`/KOUN/netcdf/code_index.xml -I "$INPUTS" -o `pwd`/csv/ngf -p `pwd`/polygons -F 60 -N $NUMINPUTS -V --verbose
After the above commands are run, we will have a set of comma-separated-values (CSV) files in csv/gf corresponding to gustfronts and another set of CSV files corresponding to not-gustfronts in csv/ngf.
Step 4: Create a Linear Regression Model to identify gustfronts
If you are using R, you should combine the two sets of files, making to sure add a new column with the value 1 for gustfront pixels and 0 for not-gustfront pixels. Like this:
head -q csv/gf/* | head -1 | awk '{print $0",GustFront"}' > csv/train.csv
cat csv/gf/*.csv | grep -v Time | awk '{print $0",1"}'  >> csv/train.csv
cat csv/ngf/*.csv | grep -v Time | awk '{print $0",0"}' >> csv/train.csv
The very first line (head) simply carries over the column information from the original CSV files. The reason for the “grep -v” on the second and third lines is to remove this header line from all subsequent output. At this point, you will now have a “train.csv” with all the pixel data and you can use R’s read.csv to read it and process it.
The R program to do the linear regression:
data <- read.csv("csv/train.csv")
data <- data[ data$Reflectivity < 30, ]
data <- data[ data$RhoHV < 0.9, ]

numgustfronts <- length( data[data$GustFront > 0.5,1] )
numnegatives  <- length( data[data$GustFront < 0.5,1] )
weights <- data$RhoHV
weights[ data$GustFront > 0.5 ] <- 0.5/numgustfronts
weights[ data$GustFront < 0.5 ] <- 0.5/numnegatives

model2 <- lm( GustFront ~ abs(AliasedVelocity - 6) + ChangeInReflectivity + abs(Kdp_approx) + abs(Reflectivity - 13) + RhoHV + abs(Zdr), data=data, weights=weights )
You may notice that I have additional columns in my output — I used existing WDSS-II tools (beyond the scope of this blog) to produce a ChangeInReflectivity (over time) and to approximate the Kdp.
Step 5: Draw histograms using Python
You could use R itself to draw histograms, but these days, I prefer using Python, and so I will read the individual files from within the Python program itself. My Python program, for simplicity, will read and plot only the gustfront csv files (repeat for the non-gustfront data).
The first part of the Python program reads in the data:
#!/usr/bin/python
import matplotlib as mpl
import matplotlib.pyplot as plt
import numpy as np
import os

(VEL,DELREF,FZAGG,KDP,REF,RHOHV,ZDR,TIME,LAT,LON,NUMDATACOLS)=range(0,11)

PREFIX="gf"; TITLE="gustfronts"
#PREFIX="ngf"; TITLE="non-gustfronts"

indir="/scratch2/lakshman/gustfront/csv/" + PREFIX

# read all the files in the above directory ...
files = os.listdir(indir)
alldata = np.empty([0,NUMDATACOLS])
for file in files:
  try:
     # read file, but convert last-but-two element (which is time) to zero
     data = np.loadtxt(indir + "/" + file, comments="#", delimiter=",", unpack=False, skiprows=1, converters={(NUMDATACOLS-3): lambda s: 0} )
     # remove any points that do not have a valid value
     sel = data[:,0] > -999
     for col in xrange(1,NUMDATACOLS):
        sel = np.logical_and(sel, data[:,col] > -999)
     sel = np.logical_and(sel, data[:,RHOHV] < 0.99 )  # rhohv valid value < 1
     data = data[sel]
     print np.shape(data)
     alldata = np.row_stack( (alldata, data) )
  except:
     print "Ignoring " + file
As I read in the data, I append it to an array called “alldata”, so at the end of the loop, my “alldata” contains all the valid (non-missing) data in the CSV files.
The next step is to define two Python functions, one to compute the nth percentile of the data and the other to plot a nice-looking histogram:
def percentile(a, P):
  # sort a
  a = np.sort(a)
  n = int( round(P*len(a) + 0.5) )
  if n > 1:
     return a[n-2]
  else:
     return a[0]

def plothist(a, title):
  global nrows, ncols, plotno
  axes = plt.subplot(nrows,ncols, plotno)
  weights = np.ones_like(a) / len(a)
  axes.hist(a, numbins, facecolor='green', normed=False, alpha=0.5, weights=weights)
  p = percentile( np.abs(a), 0.1 )
  plt.plot( [p,p], axes.get_ylim(), 'b--' )
  pos = axes.get_ylim()[0] * 0.25 + axes.get_ylim()[1] * 0.75
  axes.annotate( np.around(p,2),
                 xy=(p, pos), xycoords='data',
                 xytext=(50,30), textcoords='offset points',
                 arrowprops=dict(arrowstyle="->",
                      connectionstyle="angle3,angleA=90,angleB=0") )
  p = percentile( np.abs(a), 0.5 )
  plt.plot( [p,p], axes.get_ylim(), 'b--' )
  pos = axes.get_ylim()[0] * 0.75 + axes.get_ylim()[1] * 0.25
  axes.annotate( np.around(p,2),
                 xy=(p, pos), xycoords='data',
                 xytext=(50,30), textcoords='offset points',
                 arrowprops=dict(arrowstyle="->",
                      connectionstyle="angle3,angleA=90,angleB=0") )
  p = percentile( np.abs(a), 0.9 )
  plt.plot( [p,p], axes.get_ylim(), 'b--' )
  axes.annotate( np.around(p,2),
                 xy=(p, np.mean(axes.get_ylim())), xycoords='data',
                 xytext=(-50,30), textcoords='offset points',
                 arrowprops=dict(arrowstyle="->",
                      connectionstyle="angle3,angleA=90,angleB=0") )
  axes.set_ylabel("Frequency")
  axes.set_xlabel(title)
  #plt.title("Distribution of " + title)
  plotno = plotno + 1
Then, simply call the histogram function once per variable:
# process the data
data = alldata
print "Total: ",np.shape(data)
plotno=1
nrows=3
ncols=3
numbins=20
plt.figure(figsize=(15,12))
plothist( np.abs(data[:,VEL]), '|Velocity| (m/s)')
plothist( data[:,REF], 'Reflectivity (dBZ)' )
plothist( data[:,RHOHV], 'RhoHV' )
plothist( np.abs(data[:,ZDR]), '|Zdr| (dB)')
plothist( np.abs(data[:,KDP]), '|Kdp| (deg)')
plothist( data[:,DELREF], 'Change in Reflectivity (dBZ)' )
plothist( data[:,FZAGG], 'Fuzzy Aggregate')
fig = plt.gcf()
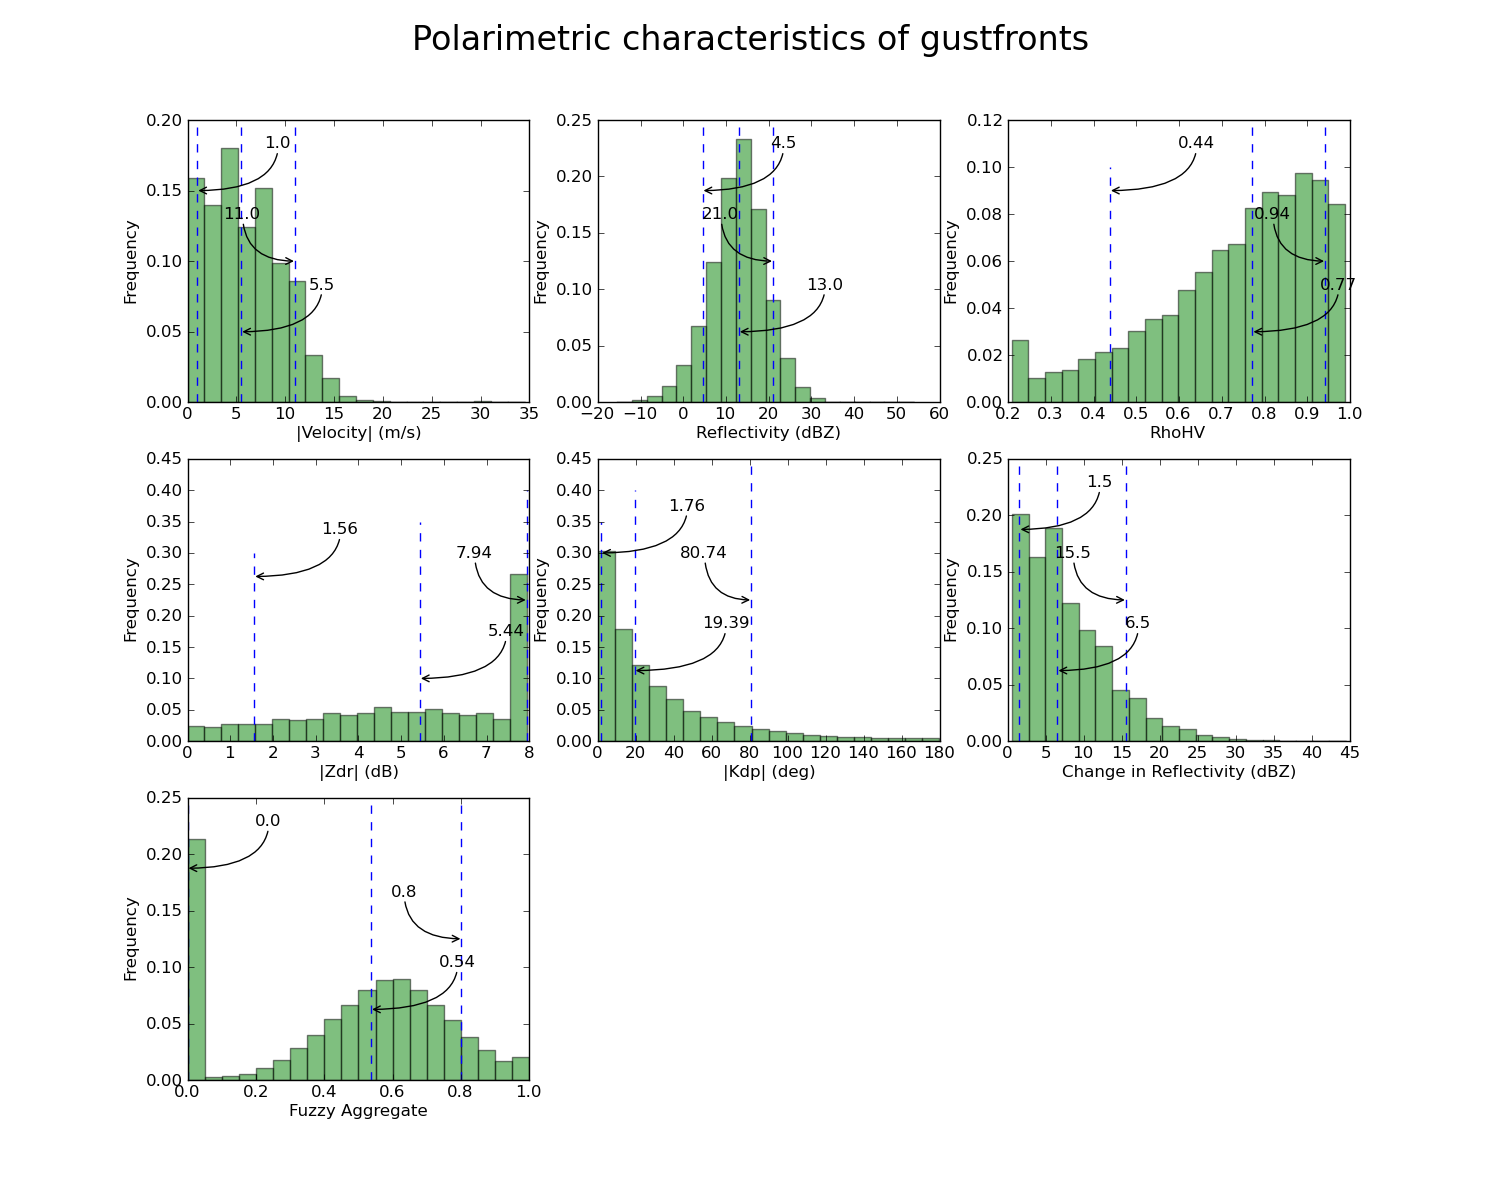
fig.suptitle("Polarimetric characteristics of " + TITLE, fontsize=24)
#plt.show()
plt.savefig( PREFIX + 'stats.png') #, bbox_inches='tight')
The final output looks like this: